Make your own compost – this is how waste becomes valuable humus
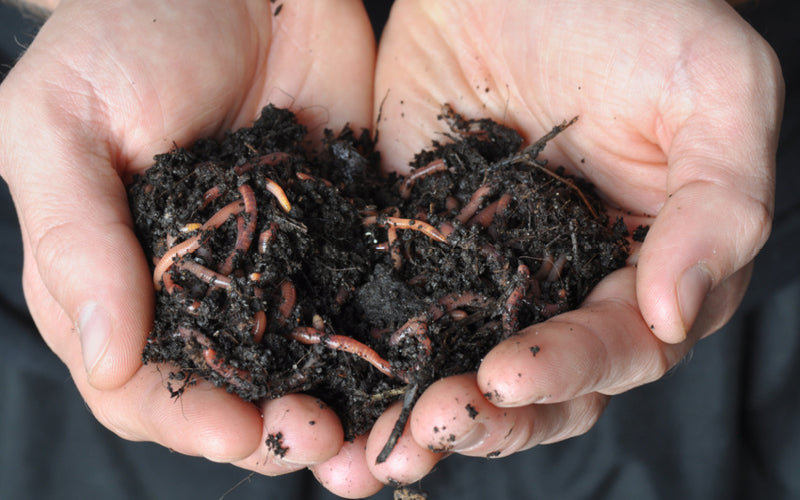
Compost is truly a gardening treasure—sustainable, nutrient-rich, and incredibly easy to make. If you compost your kitchen and garden waste instead of throwing it in the bin, you not only protect the environment but also receive valuable fertilizer in return, completely without chemicals. Earthworms, microorganisms, and other organisms do their work, transforming organic waste into nutrient-rich humus. The result: fertile soil, healthy plants, and less waste. In this article, you'll learn how to compost properly, what goes into it, and why a compost heap is worthwhile for every garden.
The right location for compost
The best location is a partially shaded, wind-protected spot where the compost is protected from extreme weather. To avoid spoiling the appearance of the garden, it is ideal if the compost heap is somewhat hidden behind a hedge or a garden shed, but still easy to reach. The subsoil must not be sealed with paving stones, otherwise the beneficial organisms from the subsoil cannot migrate into the heap. It is best to loosen the subsoil a little beforehand. In the blazing sun, the microorganisms dry out quickly, and in cold, damp corners they work too slowly. If the summer is very dry, you should occasionally water the compost with water from a rain barrel. Conversely, if the compost is too wet, dry material can be mixed in.
Choosing the right composter
Composters come in various designs: made of wood, metal mesh, and plastic. Regardless of the material, whether purchased or homemade, always plan for an area of at least 1 x 2 meters. Overall, a compost heap should not exceed two meters in height and ideally be located half a meter away from your neighbor's garden. Thermo-composters made of plastic, which you can buy ready-made at garden centers, often have a convenient removal hatch for the finished compost; they also produce the fastest decomposition. However, due to a lack of proper ventilation, and especially when a lot of kitchen waste is added, rotting occurs easily in such composters. The classic is the wooden compost heap. Models with a removable side wall are particularly practical, as the finished compost is easier to access later. A wooden compost heap ensures good ventilation, is easy to set up, and visually enhances an otherwise loose heap. The basic rule is: you need two containers: one for the decomposition process and a second for the fresh materials.


It's all about the mix
The secret to the perfect compost heap lies in the correct layering and mixing of waste. Therefore, it is first important to know what can and cannot be thrown in. Kitchen scraps such as eggshells, nutshells, fruit and vegetable scraps, coffee grounds, and tea bags are all allowed in the compost. However, be sure to remove the small metal clip from the tea bags! Garden waste such as leaves, straw, moss, stable manure, hedge, shrub, and grass clippings, as well as chopped branches, can also be safely disposed of in the compost. No matter what you put on the compost, it should be well shredded so that the transformation can take place more quickly. Kitchen scraps are best shredded in the kitchen. Of course, you can also compost weeds, but you should make sure they are not producing seeds. If the weeds have already set seeds, it is best to dispose of them in the organic waste bin.
And what shouldn't be included? Parts of diseased plants, leftover fish or dairy products, citrus fruit peels, and other chemically treated fruit peels have no place in the compost. Old bread and meat scraps attract rats and mice. Thick branches, painted wood, vacuum cleaner bags, street dirt, textiles, and any metal, plastic, or glass are not compostable.
Make sure to alternate dry and wet garden waste, and also mix coarse and fine waste. This ensures sufficient oxygen gets into the compost pile, which prevents the pile from starting to rot. The proportions of nitrogen-rich waste (kitchen and garden scraps) and carbon-rich waste (pruning grass and straw) should be balanced.
Step by step – on the mission “Black Gold”
First, place a layer of chopped up branches and twigs (e.g., from autumn tree pruning or hedge trimmings) on the soil about 20 cm deep. This allows any moisture to escape downwards. To stimulate the rotting process, it is a good idea to add a layer of already decomposed compost from last year every now and then. If you don't have any decomposed compost, grass clippings or old leaves are also suitable. You can cover this layer with well-chopped garden or kitchen waste. Then add another layer of grass clippings, and so on. It is important that the alternating layers of materials are always loose - this will prevent rotting. When the container is full, it should be covered with garden soil, for example, because compost needs two things: warmth and oxygen - this is how the rotting process can progress optimally. It is best to alternate between two containers. This way, one always has fresh soil available. After about 4 months, you will have your first raw compost, which already contains many nutrients. You can use it now or repot it and let it continue ripening. Regular repotting ensures better ventilation and a temperature balance between the cooler outside and the warmer inside.
And what happened?
The compost is ready when the soil crumbles and has turned a dark brown color. It also has a pleasant earthy scent. Depending on the weather and the layering method, this will occur after approximately six to twelve months. During this time, small animals such as worms and microorganisms (e.g., fungi and bacteria) decompose organic matter into fertile soil. This process will proceed more quickly if you sprinkle compost accelerator between the individual layers.
Mature compost is ideal for vegetable gardens, flower and perennial beds, berry bushes, and fruit tree trunks. Typically, 5 to 30 kilograms are applied per 10 square meters, depending on the nutrient needs of the respective plants.
Everything is possible – even balcony compost
Even those without a garden can compost in a small container – all you need is a simple bucket (at least 35 liters in volume) with a lid. Drill small holes (about 12 mm in diameter) about 10 cm above the bottom of the bucket to allow for oxygen.
Following the same formula as with a compost heap—chop, mix, keep moist, and cover—you'll have your own little compost heap. First, line the bucket with a layer of shredded material (or, if you don't have one, shredded cardboard boxes) to allow good air circulation. Next, add kitchen scraps and balcony scraps and mix thoroughly. It's best to add one-third shredded material each time you add organic waste to the compost. If the compost gets too dry, you can add water using a small watering can with a sprinkler attachment. If you notice any smells of decay, you can regularly add rock flour to the compost. The mini-compost is always covered with a lid. After just a few months, you'll have fertile, fine-crumbly compost that your balcony plants—and, of course, your vegetables—will enjoy.