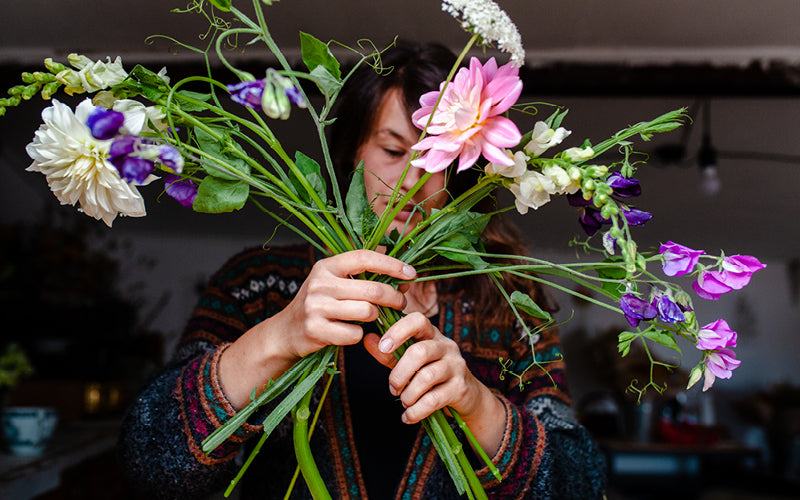
Zum Hauptinhalt
← previous post  / next post →

We tie a dreamy summer bouquet

We'll create a dreamy summer bouquet from the abundant blooms of the summer garden! Bouquet-making takes practice—it's not for nothing that training to become a florist takes several years. With patience and perseverance, you can certainly master this art yourself. We'll show you how!

Wir binden einen traumhaften Sommer Blumenstrauß
© Grit Hartung

This is what we need for our dreamy summer bouquet

Summer flowers
garden shears
Natural raffia

Preparation

The basic principle is that the delicate stems must not be bent or broken during tying, so that every flower in the vase receives water. Furthermore, there should be no leaves in the water in the vase. The leaves would quickly rot, significantly reducing the shelf life of the cut flowers.

Zinnia - Zinnia elegans 'Oklahoma Pink'
€3,50
Jewelery basket - Cosmos bipinnatus 'Double Click Bicolor Pink'
€3,90
Summer aster - Callistephus chinensis 'King Size Pink'
€3,90
Globe amaranth - Gomphrena globosa 'QIS Pink'
€3,90

Clean stems

Let's get started! The first step is to prepare my slowflowers and cut greenery for tying. I clean the stems, meaning I remove at least the lower half of the stem, but usually two-thirds, of leaves and branches.

Define key points

Once all the stems are trimmed, I determine the corners of my natural summer bouquet. To do this, I cross two flower stems in front of my torso and move the blossoms up and down until I find the perfect outer edges for the bouquet.

© Grit Hartung

Tying a bouquet

Fill the bouquet

In the next step, I always place the flowers from top right to bottom left. It's important to maintain the same direction throughout so the stems don't bend over each other.

Admittedly, this step takes some practice to get the hang of. In any case, it helps to decide on a direction and then stick to it meticulously. Always from top right to bottom left, top right to bottom left, and so on.

Once 12 to 15 stems have been incorporated into the bouquet, a spiral will form. At this point, it's time to check if a stem was accidentally inserted against the direction. The bouquet can now be rotated in your hand, allowing the flowers to be placed on the bouquet from all sides.

Don't forget to have fun

When arranging flowers, always stay relaxed and actively relax your hands, arms, and shoulders. Tying bouquets can be fun! With a little practice, this special design process can even become a meditative exercise.
The thoughtful arrangement of colors, shapes and scents gives me extraordinary joy.

Round off the composition

Amidst all the joy of the growing bouquet, I also take a critical look at it from time to time. Here and there, I trim off any unwanted leaves, stems, or blossoms. This gradually creates a unique composition of leaves and blossoms.

© Grit Hartung

Finding the end

Now it's important to come to an end, to complete the process. People have told me in my workshops and on other occasions that this isn't always easy.

Personally, I rely on my intuition and encourage others to do the same. There's a clear point at which I feel the bouquet is finished. The golden rule is: A bouquet doesn't have to be perfect, just that it pleases the eye. Your gut often decides this better than your head.

Tying the bouquet

Next comes the tying. I place a ribbon of natural raffia where the hand held the bouquet and wrap it tightly around the bouquet twice. Then I secure it with a double knot.

I usually wrap the rest of the raffia around the bouquet as well, as I like the thicker binding. I make sure to pull the raffia taut and secure it again with a double knot.

The excess is trimmed close to the knot with scissors. For me, it's a given to tie my bouquets exclusively with natural materials. Firstly, I find natural raffia, linen, or cotton ribbons very aesthetically pleasing. Furthermore, it's simply practical to be able to dispose of the spent bouquet, including the natural raffia, in the compost instead of having to pry the withered or even rotten stems out of the plastic ribbon.
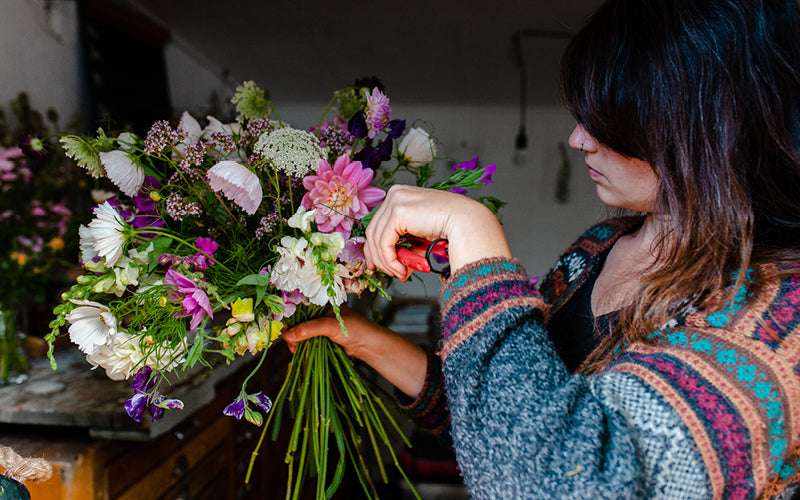
Shorten the stems

In the next step, I cut the stems at the same height. I also check that there are really no leaves left under the bast.

Recommendation

After cutting, the finished bouquet is placed in a vase of fresh water. The flowers should remain in a cool, shady place. I recommend cutting the flowers once a day, ideally daily, and placing them in a clean vase of fresh water.

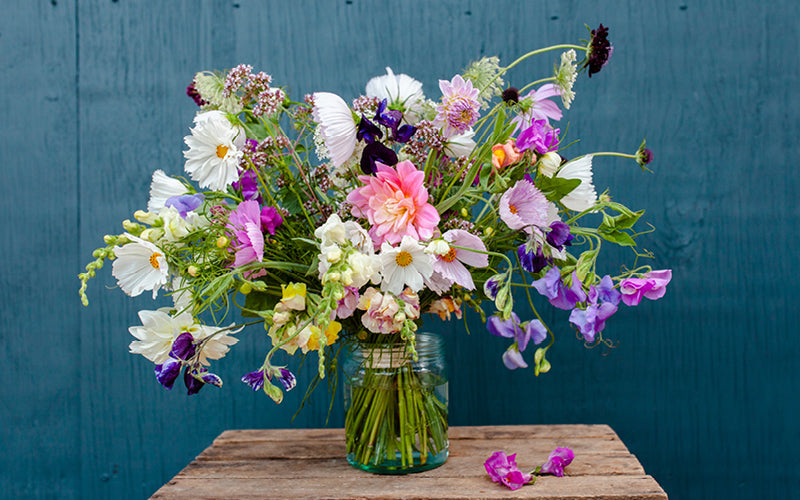
This summer bouquet can be placed on the living room table to liven up your home or decorate a festive summer table. Now it's time to enjoy our natural summer bouquet with your own slowflowers!

Flowers as a gift

A hand-tied bouquet also makes the ideal birthday present. If it's being given as a gift or has a long journey ahead of it, the bouquet should be wrapped.

One thing is guaranteed: a hand-tied bouquet of flowers from your own garden will delight both the recipient and the giver!

→ nächster Post: Sowing on the windowsill
← vorheriger Post: Make your own compost – this is how waste becomes valuable humus

The content of this article is from the book:

Chantal Remmert
Slowflowers –Wild gardens and untamed bouquets

Price 34,00 €
ISBN 978-3-258-08293-6
Main Publishing

Dirty hands, naturally grown plants, and a wild sea of ​​blossoms – that's what characterizes Slowflowers from your own garden. DIYs and tips, from sowing to harvesting, step-by-step instructions, and techniques for tying fragrant bouquets and creating stunning arrangements. This book combines sustainability with the joy of flowers and gardening.


Dein Warenkorb

Dein Warenkorb ist derzeit leer.
Klick hier, um den Einkauf fortzusetzen.
Danke, dass du uns kontaktiert hast! Wir melden uns in Kürze bei dir. Thanks for subscribing Thanks! We will notify you when it becomes available! Die maximale Anzahl von Artikeln wurde bereits hinzugefügt Es muss nur noch ein Artikel in den Warenkorb gelegt werden Es sind nur noch [num_items] Artikel übrig, die dem Warenkorb hinzugefügt werden können